Search This Blog

Friday, 24 April 2015

Sunday Breakfast - Caramelized Onion& Bacon Egg sandwich


Breakfast is undeniably the best meal, for many reasons.. You can probably eat "almost" anything and get away with it as you burn most of it, unless you plan to sit around afterwards. Regardless I love to play around with my breakfasts, something I wasn't accustomed to as I use to skip it. There are many benefits to eating in the morning, but for now I'll' stick to spilling my weekend Breakfast sandwich. 

Why a weekend? There are a few components to it, thus not a quick grab and go snack, but quite an indulgence to devour, so take the time on the weekend, or when time is free in your schedule, to try this little daredevil sandwich!

Yields 2 generous sandwiches 
Prep time 20 minutes

Ingredients:
Preheat oven to 400 degrees f.
4 Slices of your Favorite bread - I use Pumpernickel
4 slices of bacon
4 eggs
8 slices strong cheddar cheese
1/2 small onion
4-5 mushrooms
1/8 tsp clove powder
1/4 tsp balsamic vinegar
1/4 tsp butter
Mayonnaise
Lettuce
Salt/Pepper to taste
EVOO


Step 1. Place your bacon on a flat nonstick pan, p[lace in the oven until crispy to your liking. Approx 15 minutes. Keep an eye while prepping the rest


Step. 2. Caramalized Onions and Mushrooms: Thinly slice the onion and mushroom, set aside. In a frypan, heat 1/4 tsp EVOO and saute the onions and mushroom. Once the oil is absorbed, toss in the butter and clove and when absorbed, add 1/4 tsp water directly into the frypan, this will make the onions turn translucent. Once the water is evaporated, add the balsamic vinegar, sprinkle salt and pepper and set aside off the heat once the liquid is absorbed.

Step 3. Prep all other ingredients, clean lettuce leaves, slice cheese and set your bacon when it's ready on a paper towel to absorb the excess oil. Once all is done, tackle the eggs, last minute as it won't take long.

Step 4. In a nonstick frypan, heat a 1/4 tsp EVOO and gently crack eggs. Cook over easy, and when turning poke the yellow a few seconds before you remove them from the heat, unless you like it runny. Sprinkle a little of Salt/Pepper. Set aside

In the meantime, toast your bread. Once ready to assemble:
Mayonnaise on the bottom
Cheese slices
Eggs over cheese
Place bacon over eggs
caramelized onions and mushrooms
drizzle Sriracha sauce
Lettuce leaves
Top with bread (you can put mayo or butter if you wish, but you have enough juice running in this sandwich)


Slice and enjoy... Try to eat only one :)

Sincerely
T @stuffedfaces

Wednesday, 22 April 2015

Sweet Soy Tender Flank steak


Flank steak is a great piece of meat when well marinated and properly cooked. Tasty, juicy and wallet savvy, this cut is well underestimated. Here's a simple marinade that will tenderize your meat and give it a succulent taste. You can prepare this as much as 2-3 days ahead, or the morning of. Obviously, the more the better.

yields 2-4 ppl
prep time 10 minutes
cooking time about 15min

Ingredients:
1 lb Flank Steak
1/2 tsp whole all spice
1/4 tsp whole cloves
1/2 tsp whole black pepper
1/8 tsp Thai chili flakes
1/4 cup rice vinegar
1 tbsp sweet soy (Bango) see below step 3 for more info
2 garlic cloves smashed not chopped

Once ready to cook
1/2 tsp salt
1 tsp EVOO
1 tsp butter


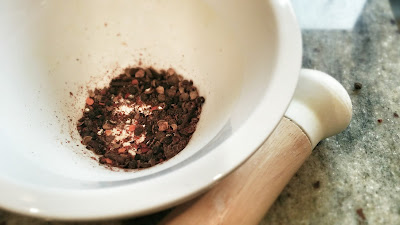
Step 1. In a mortar and pestle preferably, put all dry ingredients except the salt and grind as fine as you can. If using a spice blender, don't over chop, as the texture still needs to be somewhat coarse. 


Step 2. Pat dry your flank steak with paper towel and set on a board. Sprinkle the dry ingredient mix and rub thoroughly on both sides.

Step 3. In a deep dish large enough for the flank, or a ziplock, mix rice vinegar with sweet soy. combine well and place your flank steak. Carefully smash the garlic cloves with the side of your knife and toss it in with the meat. Let it rest as much as possible, up to 2-3 days. I did it that morning and it was still tender!


*About sweet soy sauce: If you don't have it on hand, you can use regular soy adding a little sugar or molasses to cut the saltiness, although if you can find the sweet soy, you will definitely prefer it to the regular salty version. It's gluten free and has a better taste, without all its sodium. I purchased Bango from C&T or MarchĂ© Hawaii, or you can probably find it at any Asian supermarket. On average, it's priced as any other Gluten Free soy sauce but with more value as the bottle is larger. Thus all more to buy this one versus the standard soy kind. The texture is thicker, therefore I water it down if needed, or use it as is if I want a thicker sauce.


Step 4. Once ready to cook, Remove the meat from the ziplock about 15-20 minutes before cooking. Place it on a paper towel to absorb the liquid, as you need the meat to be externally dry in order to grill, if not the meat will "boil" vs "sear".

Step 5. Preheat oven to 425 degrees f.
Sprinkle and pat salt on both side of the flank. Put 1 tsp EVOO in a non stick fry pan on the stovetop on high, and once oil starts to "dance" in the pan, gently place your flank and grill 3-4 minutes per side, until nice and grilled. Toss in the butter and once melted, drizzle the meat with its sauce.


Step 6. Place in the oven, middle rack for about 5-7 minutes, depending the doneness  you like it. Increase cooking time if you prefer well done, although flank steak is great medium.

Here is a quick temp chart you can refer to.


Step 7. Remove and let stand on a wooden board for 1 minute before slicing.

Step 8. While the meat is resting, place back the pan on the stovetop high heat, add 1 to 2 tbsp broth and let the sauce reduce a few seconds. If you have remaining wine, you can use instead, although it may be acidic combined with the rice vinegar. you can mix wine and broth.


step 8. Slice the flank against the grain in thin slices. Place the meat on your plate and drizzle sauce reduction.

Serve it on salad, rice or even beef taco, flank steak is delicious no matter how you eat it!

** If you slice the meat and it's under-cooked, place the slices back in the pan over the sauce and continue cooking a few seconds on the stovetop.

Enjoy
Sincerely
T @stuffedfaces

Tuesday, 21 April 2015

Quick & Easy Delicious Duck Magret


Duck is one of my top protein choices when it comes to a leaner, tastier meat. Definitely a queen of its category. Some consider it to be poultry but should be treated as a red meat, thus you can cook it as so, medium rare preferably. Many people are skeptical when it comes to the pinkness and salmonella, although after many reviews and much reading, the important factor to retain is the temperature needed in order to kill the bacteria is 160. Thus, if you have noticed when cooking chicken, the breast will be whiter than the legs when cooked at that temperature as the meat is more red. Therefore same applies to the duck, as it's a red meat, the temperature will be at 160 and still quite more pink in the center. see link for more info

Duck is tasty, juicy and spectacular all in itself. You can definitely play around with the seasoning, although the importance is to understand the meat first, its cooking methods then experiment. Here is a basic recipe, for Duck lovers, apprentice or adept.


Ingredients:
Duck Magret
1 tsp coarse sea salt 
1/2 tsp ground black pepper


First off.. Clean duck is a happy duck


Step 1. Rinse and pat dry
You might find little brown spots on the skin, and that is completely normal. The meat simply needs to be rinsed under cool water and patted dry with paper towel. Set on a wooden board. 


Step 2. Remove the vein
Turn the duck magret skin side down, and you will find the central vein. It runs to the center, therefore carefully with a sharp knife, make a little slit along the vein to remove it completely.


Step 3. Ready to prep
Preheat your oven to 385 degrees f. 


Skin side up, score the skin making a checkered pattern.
Using coarse sea salt preferably, combine with freshly ground pepper and rub thoroughly the skin side only and in its cuts. That allow the fat to melt faster in order to properly sear your meat, and the salt will melt into the fat seasoning the whole duck.


Step 4. Sear it

In a non stick fry pan, place on stove top on High with NO oil and once hot, carefully place your duck skin side down and sear for 3 minutes or until golden and crispy. Proceed to searing all sides a few seconds leaving the meat part to sear last, for 3 minutes.

Place in the preheated oven, middle rack, for about 5-6 minutes. You can extend the cooking if you prefer medium well, although the more you cook it, the dryer the duck will be.


Remove and let stand for a few minutes before carving. This generally completes your cooking as well, therefore take this "cooking" time in consideration... Basically remove from the oven when it's almost to your liking!

Remember, duck fat is actually healthier than many other processed or cooking fats. read more Don't get thrown off when you see the amount of fat under the skin, as you are cooking with its own fat. Many chef recipes replace overall fats with duck fat.

Serve it on rice, salad or with some fresh vegetables, see my side dish recipe for tips cipollini & grelot potatoes and enjoy your delicious duck!

Sincerely
T @stuffedfaces

Monday, 20 April 2015

Side dish - Cipollini & Grelot potatoes


We find an array of main dishes, sometimes we just need some ideas on side dishes. You don't have to complicate things, the simpler the better... KISS; Keep It Simple S... 

I make a lot of protein, and this little side dish works with almost any of them.. Poultry, Duck, Red meat or even fish! Cipollini is a sweet little onion, simple to cook and goes very well with little potatoes called Grelot. You can find those in purple, white or red shades. The small size goes hand in hand with the Cipollini size, thus they cook at the same time and they marry well in taste. In addition they taste magnificent caramelized. 

Yields 2-4 people
Prep time 5 minutes
cook time 1h to 1:30h

Ingredients:
Preheat oven to 375 degrees f.

1 to 1 1/2 cup Grelot potatoes (depending how much you want to serve and/or potato size pref. smallest)
4-6 cipollini peeled 
1 large garlic clove chopped thick
2 scallion (green long onion) chopped finely
1/2 cup broth
1 tbsp EVOO
1 tsp Salt
1 tsp Black pepper


1. Carefully poke the potatoes with a knife, around a few times. Peel the cipollini, chop the garlic and scallion, set aside.

*: sometimes cipollini are tricky to peel as the skin is thin. It can help to peel under water. Dry them if so, as the water sparks up in oil.


2. In a frypan, heat EVOO on high heat and gently add the potatoes, cipollini, garlic and sprinkle salt/pepper. Once cipollini is seared on both sides, add the broth and place the frypan in the oven, for 45 minutes. 

**: Make sure your frypan handle is metal. If plastic or not certain the material, cover complete handle with aluminum foil, to prevent melting.

3. Once 45 minutes elapses, verify tenderness of potatoes, it may vary depending on the size of the potatoes. 

4. Once done to your liking, remove and place in a bowl. Sprinkle the scallions and toss. If needed, sprinkle a dash of EVOO and salt/pepper.


NOTE: You can add any vegetable to this side, obviously there is no limit. Manage the cooking time accordingly, tender veggies add at the end such as zucchinis, other harder veggies such as carrots add at the early stages. 

Enjoy

Sincerely
T @stuffedfaces

Sweet Pulled Pork


Pork has many amazing cuts that are delicious and affordable. Shoulder is definitely one of my favorites, and gives a pulled pork the best of its kind. You can choose a fatty cut with the skin and fat on, or you can select a lean cut with skin and top fat removed. This time, I used the lean version since I have to cut down on fatty foods before summer kicks in, without cutting my favorite meals! 

There are many recipes for pulled pork, and again many ingredients you can enjoy playing around with. Remember, you always need bitterness to sweetness, or at least in my book you do. Thus, in every sweetened recipe; ribs, pulled pork etc., using brown sugars or any honey glaze technique, it is important to add a vinegar; white, apple cider or balsamic, to cut that sweetness. Don't forget your salt and pepper, even in small doses as it's crucial to most recipes (even deserts). 

Here's one of my pulled pork version, unique and delicious. You can stuff tacos, serve it on bread, toss it in pasta, sprinkle on your pizza or even serve it in the morning with a side of sunny side eggs... 
Whichever way you want to eat it, it's always good.


Yields 6-8 people 
Prep time 20 minutes
cooking time 5-6 hours oven or slow cooker

Ingredients:
Preheat oven at 250 degrees f.
1kg to 1.25kg Lean Pork shoulder

Dry mix combined in a small bowl
1 tsp salt
1 tsp Paprika
1 tsp Chili powder
1 tsp Mustard powder
1 tsp ground cloves
1 tsp onion powder
1/8 tsp Thai Chili flakes or 1/4 tsp regular Chili flakes
1/4 tsp cinnamon
2 tbsp brown sugar
1/2 tsp black pepper

Liquid in a deep roaster pan
1 tsp Ginger paste or fresh ginger grated
1 tsp minced garlic (jar or fresh)
4 whole cloves
150 ml tomato sauce can
1/3 cup red wine
1 tbsp white vinegar
1 sweet potato diced small cubes 
1 onion cut in quarts
1 tsp Salt/Pepper


Steps

1. Rinse and pat dry your meat, place on a large wooden board or plate.


2. In a bowl, mix well all dry ingredients. Coat the shoulder meat all around with dry mixture. Rub with hands, until meat is well coated.


3. In a deep oven roaster, mix all "liquid" ingredients, including the onions, sweet potato etc. 


4. Gently place the meat in the roaster with the liquid. Cover tightly with plastic wrap, then aluminum wrap, sealing all around nicely. Make sure to overlap the plastic with the aluminum. That way, you are covering the plastic from the heat in order not to melt, and sealing the taste and steam. Place the lid as well, if you have (not necessary if you wrap properly).


5. Place in the preheated oven set to 250 degrees f, center rack for approx 5-6 hours depending the size of the roast. If using a slow cooker, follow same procedures and cook approx same time depending your cooker. 

NOTE: You can do it overnight, lower your heat if so at 175 degrees f.


6. Remove from the oven, place the meat aside in a separate dish and with a hand blender, puree the liquid. As the sweet potato, onions and all other chunks will be very tender, you can also use a potato masher if you don't have a blender. The texture will thicken the pulled pork, the sweet potato will give a natural sweetness and starch.

7. Place back the meat in the pan, shred with 2 forks and combine with the mixture. You can taste and adjust any components, salt/pepper etc. 

8. Increase heat oven to 400 degrees f. and finish uncovered until preferred consistency, less sauce more time, more sauce less time!
Enjoy

Sincerely
T @Stuffedfaces

Sunday, 12 April 2015

Orange Basil & coriander Chicken


This recipe stunned me. I wanted to try something different and combined a few ingredients I had and came up with this recipe. If you've already tried a similar version, than I'm sure you will enjoy this one.


The combination of the Orange with the basil and coriander creates an aromatic, delicious and unique taste to chicken. It's simple, quick and will surely get your guests or family talking about this dish.


Here's how to make it…


Serves 4
(increase equally for more)
Prep time 15 minutes
Cooking time 45min to 1h00

Ingredients
Preheat oven to 385 degrees f.

1 tsp EVOO
1 tsp butter
4 Chicken Legs with skin

Rub:
1 tbsp coriander grains
zest of 1 orange
1/4 tsp salt
1/2 tsp black pepper

Sauce:
4 small juicy oranges squeezed
1/8 tsp ground cloves 

1/4 tsp salt
1/2 cup chicken broth low sodium preferably or homemade  
1/4 tsp sesame oil 
1/2 cup sweet basil chopped (Asian basil preferably is sweet)


Steps: 
1. Rinse and tap dry the chick, lay on a wooden board and set aside.  


2. In a mortar and pestel, grind the coriander, 1/4 tsp salt and pepper till coriander is fine, almost powdery. Add the orange zest and combine. Rub the chicken all around, also under the skin.

3. In a large non stick pan, on med-high heat melt EVOO and butter to brown the chicken. The butter and Oil gives a nice browning texture and prevents from burning. Sir the chicken skin side down first for a few minutes until nice and gold and turn skin up to brown bottom as well. This creates a nice "shield" for the chicken keeping the meat juice inside while cooking and gives a beautiful nutty taste. 

4. In a bowl, combine Orange juice, broth, cloves, 1/4 salt, basil leaves chopped and sesame oil. whisk and pour over the chicken.


5. Place at the center of the oven uncovered for approx. 
45 minutes. Baste your chicken with its juice every 10 minutes or so. The more you baste, the better the taste and skin comes out.

6. To know if your chicken is ready and not overcooked, with a knife poke the meat near the thickest bone (longest part to cook), generally drumstick and press down. The juice should be clear, not pink and the chicken should remain juicy and not dry. You can use a meat thermometer if preferred, but I've had surprises… That way you are certain. 


*NOTE: Many presume chicken should be dry to be ready, which is false. You want it to be juicy but clear color. (PS: if the chicken is cooked in a red base such as tomato juice or paprika etc, don't look at the color of the juice, but more at the meat color near the bone, as the liquid color will continuously be red.) 


Serve on a bed of Jasmine or Basmati rice and a side of sautĂ©ed kale. 


Enjoy

Sincerely 
T @stuffedfaces 

Thursday, 9 April 2015

Succulent Beef Stroganoff


 Beef Stroganoff is simple, easy and light on the wallet. You can feed a complete family, a friendly supper or simply have some for a few leftovers, regardless this feeds quite a bit at an affordable price... And of course is delicious! 

serves 4-6 people 
Prep time 15 minutes 
Cooking time approx 1h30 (can be done a day ahead)

Ingredients
1 tbsp EVOO
0.8 to 1 kg Beef blade roast
1/2 tsp Salt 
1/2 tsp Pepper 
1/4 ground cloves
2 large Garlic cloves finely chopped 
1 large Onion in slivers
1 1/2 cups chopped mushroom (white or café)
2 Bay leaves
1 tsp Balsamic vinegar 
1/2 cup Red wine
1/2 Cup water 
2 cups broth preferably homemade
1/2 cup freshly shredded Parmesan


*NOTE: Your skillet should be deep enough in order for the meat to be almost soaked, but should have about 2 to 3" empty around the meat. If the skillet is too large, you will need too much liquid to cover the meat and the sauce will take quite a while to reduce.

1. In a large deep skillet with a cover, heat up the oil on med-high heat to sir the meat. Dab your meat on both sides with paper towel, and sprinkle salt, cloves and pepper on both sides. Once oil is hot, sir meet approx 1-2 minutes on each side. Remove and set aside on a plate. 

2. Keeping the heat on, saute Onion, mushrooms and Garlic. Cook for a few minutes and add the bay leaf, balsamic vinegar and wine. Stir well and place the meat over the mixture and slowly pour in the the broth and water. The meat should be somewhat covered with liquid. Cover and lower heat to med-low. You want a gentle simmer for approx 1h00, turning the meat halfway.


3. Uncover slightly and continue cooking for an additional 30 minutes. The sauce will thicken by reducing. If the sauce is still too watery, increase heat and leave a bigger gap open, watch it every 10-15 minutes as it can dry rapidly. Once done, your meat will shred with a fork. Turn off the heat, shred throughout and set aside.


Assembling
4. Boil your pasta al dente. I use egg thick pasta as the combination is lethal and holds the sauce perfectly. Once your pasta is ready, strain and drizzle a small amount of EVOO on your pasta before tossing in the sauce. If you don't want to use all the sauce, put back the pasta in your pan and pour in the sauce with meat as you wish. 

5. Toss and add most of the shredded Parmesan (depending if you make all or not), and mix. Let stand a few minutes before serving as the cheese melts in the sauce and the pasta absorbs the liquid while it complets the cooking of the pasta, giving this dish a match made in heaven.

Sprinkle some freshly ground pepper and a dash of more cheese and dig in!


Enjoy
Sincerely 
T @stuffedfaces 


Best of the best Sweet Pork back ribs


I have tried various recipes for Pork ribs, it generally doesn't fail me, as long as it's braised for a while. This technique combined with the recipe is something I whipped up and it definitely is the ultimate method for me. I have boiled, cooked in the oven wrapped in a dome, grilled for a long time etc. but this beats by far all others. It's simple, and deliciously good. You can alter some items with what you have at home in terms of cooking tools and perhaps some ingredients, but the concept is what is important. Here how it goes...


2 ppl (increase equally for more)
Prep time 15 min
Cooking time under 2 hours 

Ingredients
1.5 lbs Pork Back Ribs
1/2 cup Brown sugar
1 tsp Paprika powder 
1/4 Chili Powder (can increase if preferred spicier) 
1/2 tsp Onion Powder 
1/4 tsp ground Clove
1 tsp Mustard powder 
1 tsp Salt 
1/2 tsp pepper 
1 tbsp sweet soy (I use Bango as it is Gluten free and sweet like molasses) I found it at C&T Market
2 tbsp white vinegar 
1/4 tsp Worcestershire sauce
1/2 tsp ginger paste preferably (or fresh if not on hand)
2 tbsp Tomato sauce + 1 tbsp at the end (any canned sauce pure tomato)

Supplies
Baking pan with a roasting rack
Aluminum
Water
Preheat oven 385 degrees F.

Step 1. Cleaning Ribs


First off, you have to rinse and remove the membrane from the ribs. That chewy and unwanted texture is unnecessary. Simple lay your ribs meat side down, back bones facing up, grab the edge of the membrane and pull. The membrane will come off easily. Rinse and pat dry your ribs. Cut them approx 6 inches long and set aside.  

Step 2. Sauce 


In a bowl, combine all ingredients (except hickory and water from "supplies")
Whisk well, the sugar doesn't have to dissolve. You can taste the sauce and adjust if you wish, but it's pretty good so trust me.

Step 3. Prepping for cooking 


1. Using a 2 layer baking pan with rack, fill bottom pan with water about 1/3 and add roughly 10 shakes of hickory in the water. Place the rack on top making sure it doesn't touch the water and place a sheet of aluminum over the rack, enough to cover the ribs properly. Gently make a few holes  in the aluminum in order for the hickory steam to access the ribs.. that's part of the magic!

2. Place your ribs over the aluminum and coat both sides with  about 1/2 the sauce.

3. Cover the ribs well in an envelop 

4. Place another sheet of aluminum to cover the complete pan in order to keep the steam inside. Place in the oven carefully, on the center rack for 45 minutes.  

5. Once time elapsed, lower temperature to 300 degrees f and cook for another 45 minutes.

6. Carefully remove once time is done and unwrap the ribs (be careful the steam.. Keep your face away while uncovering) 

7. At this point you can either finish them off on the grill or in the oven. 


a) For oven, keep ribs in the enveloped foil, slowly pour out the liquid from the bottom pan. Add 1 tbsp of tomato sauce to the remaining sauce and coat ribs, close back and in the oven for 20 minutes, finishing up on broil uncovered for 5 minutes.

b) on BBQ, remove from foil, add 1 tbsp tomato sauce to remaining mix, coat ribs  and place on the BBQ for 10-15 minutes or until cooked to your liking.

NOTE: To know if your ribs are almost done, when holding the bone, it should easily come off but somewhat holding on the meat. If too cooked, it will fall apart. You still want to be able to enjoy that meat off the bone while eating :)

I served my ribs with my Chunky Broth Mash Potatoes and some sauteed greens like Kale or Swiss Chard. Absolutely delicious! I hope you guys try it, enjoy and share!! Don't forget to give feedback!


Enjoy
Sincerely 
T @stuffedfaces 


Wednesday, 8 April 2015

Chunky Broth Mash potato


You are most probably wondering... Huh? Chunky Broth Mash potato?? It's quite simple and amazingly good! Having an intolerance to gluten, I try to use my starch as much as possible, in the best and healthiest ways possible. So, I tried for the first time this simple recipe and not only does it work, but I think I'll stay loyal to this one!

If you are like me, all my broth is homemade. I still don't understand how some cooking shows, such as on Food network, feature Chefs cooking with store bought stock. Don't get me wrong, for a handy item, in a quick moment it's convenient, but when needed in bigger batch, homemade is definitely the best way. Besides, with all the added artificial ingredients, why wouldn't you make yours.. plus it's so simple!

Back to the starch, this recipe is very simple, gives you a decadent mashed potato without using cream or butter. How so?

Simple... I boil my potatoes in my ready homemade stock. That way, all the flavors I need combined with the natural fats of meat gives this recipe a thumbs up. It's quick, easy and amazingly good!


How to:
Russet potatoes washed, leave skin on chopped in small cubes
Fill a pot with potatoes
Cover potatoes with stock (Beef, Pork, Chicken etc.) and include some fat that condensed 
Boil till the potatoes are very tender
Keeping the potatoes in the pot, cover with lid leaving a gap and pour out 1/2 liquid*
Gently mash potatoes 
Season with Salt/pepper to your liking

*Depending how you like your mashed potatoes, chunky or creamy, manage stock when pouring... 
Creamier is more stock in..
Chunky is less stock in..

Et voilĂ 


Enjoy
Sincerely
T @stuffedfaces


Maple Glazed Mustard Salmon Filet


Salmon to me is as easy, simple and versatile as Chicken. You can alter seasoning in so many ways, and still have a different meal every time. This is a simple & delicious version I quite enjoy on many occasions.


4 full servings
Prep time 10 minutes
Cooking time 25 minutes
Preheat oven to 400 degrees f.

Ingredients:
1 1/2 lb Salmon filet rinsed and patted dry 
1 tbsp whole grain mustard 
1 tbsp Maple syrup
1/2 tsp EVOO
1/4 tsp paprika powder
1/2 tsp Salt/Pepper 
1/2 Lemon squeezed 
1/2 tsp fresh thyme 

In a bowl, combine all ingredients. Place your salmon on a baking sheet over aluminum or parchment paper and spread the mixture all over the salmon. Place in the oven, center rack for 20 minutes. regardless the size, your salmon is generally the same thickness, just lengthier. Your cooking time should remain consistent.

Broil for 4-5 minutes to finish the cooking and give the salmon a nice texture. Remove and serve over Basmati rice and nice sauteed greens... Easy and healthy and simple right?


Enjoy

Sincerely
T @stuffedfaces

Monday, 6 April 2015

Chili con Carne Fajita


 Mexican food is delicious and simple to put together. Kids, adults, friends and all love these easy put together meals, and they're fun. A great option if you want to chat around a table while creating your unique Fajita or Taco. Many ingredients work quite well with flavors such as Paprika, Chili, Beans and obviously meat. Here's a simple recipe that will always make you smile.. or lick your fingers! 

This simple recipe requires basic ingredients for your core recipe, and anything around you like to spice up your fajita with.

To start you need good tortillas. I make mine as it's quite simple, fast and definitely has a much better taste, plus I get to stay away from starch and know what i'm making. For more info, see my recipe for homemade tortilla.

For approx 8-10 Fajitas filled
time 20 minutes prep / 30 minutes cook

Ingredients for filling:
100g ground beef
100g ground pork
1 large onion
3 garlic cloves
1 fresh jalapeno
1 tbsp vegetable oil or peanut oil
1/4 tsp chili powder
1/2 tsp paprika
1/4 mustard powder
1/4 ground cloves
1 can 540 ml small black beans
1/2 cup espresso coffee brewed


Let's start 
1. Mince garlic, onion and jalapeno, heat oil in a non stick pan over med-high heat. Saute minced ingredients approx 1 minute. 


2. Add both meats and break into small pieces. Add all dry ingredients  and saute meat till it's semi cooked, some pieces are partially pink.

3. Add drained beans, mix in coffee and gently stir. If your mixture is too dry, you can add about 1/2 cup of water or tomato juice, depending how lean your meat is.

4. Let cook covered on med-low heat for about 25 minutes. If too liquid, remove lid and continue cooking for about 5-10 minutes.


5. Cover and set aside approx 15 minutes before serving. The sauce will get absorbed, and will leave you with a more consistent filling. You can make your tortilla in the meantime, once all your side components are ready!


Set your table with an assorted sides to create unique flavors. For this recipe, I combined it with a mint sour cream (chop fresh mint, toss it to the sour cream), fresh tomatoes, chopped green onion and some shredded cheese! Don't overpower on condiments... you'll lose the taste of the filling!


Enjoy
Sincerely
T @stuffedfaces